Get your FREE sensory profiles cheat sheet >>click here<<
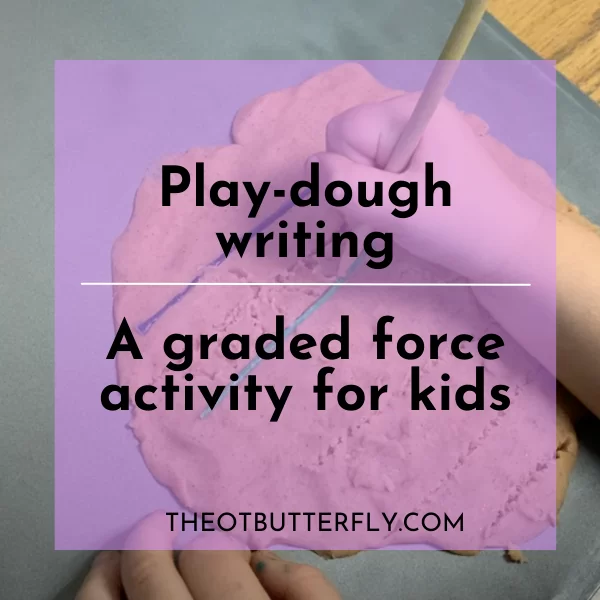
Playdough Writing: A graded force activity for kids
By: Laura Petix, MS OTR/L
Are we ever really too old to be playing with play dough? I, for one find it extremely therapeutic. If you’re a young elementary school teacher, a parent or a therapist- I know you have some play dough accessible- even during quarantine!
Play dough is so versatile, and I’m sure I can think of maybe 101 different ways to play with it, but for today- let’s stick to our theme: graded force.
If you need a quick introduction to graded force, you can read a little more about it and a long list of activities here.

Why playdough works on graded force
You can roll it, twist, cut it, poke it, stamp it, squish it and mold it.
You only need a small amount of pressure (force) to change it’s shape or make an imprint.
If you’re cutting shapes, you’ll need to push hard enough for the cookie cutter to break through.
If you’re rolling out a flat piece of playdough, you need to roll really hard at first with the rolling pin, then slightly adjust your pressure as you get the desired thickness of your playdough.
For today’s activity, the child will be using a utensil to write or draw something in the playdough.
This is a little more of an advanced graded force challenge because now the child has to consider how much force to place onto an object which will then imprint something onto the playdough (vs. how much force their own body makes directly on the object, like in the playdough ball smash)
The consequence of pushing too hard with the writing utensil in the playdough might rip through it.
The consequence of not pushing hard enough with the writing utensil in the playdough is that the letters or shapes won’t appear.
Materials
I’m creating this from #quarantineland so you know these are easy to find materials around any household (or clinic).
1. Playdough (duh)
2. A toothpick or other sharp-ish writing utensil. You could also just use a pencil.
3. Optional: Wiki Stiks if you have them. If you don’t you can purchase here. You could also use yarn, floss, or any small string to use as line boundaries.
How To
- Use the entire can of playdough to roll out a flat “paper” on the table.
- Make sure the playdough isn’t literally paper thin, you want it to have a little thickness.
- If practicing letters, add wiki stiks, or floss or yarn to create your top and bottom lines.
- Have the child write their name, or practice spelling words (you could also just practice shapes, math equations, etc)
RELATED POSTS:


SUBSCRIBE TO MY NEWSLETTER AND RECEIVE...
Free Instant access to my Members Only Vault with Resources & Activities
MEET THE AUTHOR
Laura Petix, MS OTR/L
I’m an enneagram 6, so my brain is constantly moving. My OT lenses never turn off and I can’t “un-see” the sensory and other developmental skills that go in to literally every activity. I love taking what I see and breaking it down into simple terms so parents can understand what goes into their child’s behavior and skills.